Blog Archive
Powered by Blogger.
Followers
Saturday, December 24, 2011
Behind Blue Eyes
This tutorial was written by TeddyBear on 22 Dec., 2011. Any resemblance to any other tutorial is purely coincidental
Supplies:
Tube of choice. I'm using the artwork of Kim Draper. Please do NOT use her work unless you have the proper license to do so. You can purchase her work and obtain a license from AIL
Mask - Vix_Mask308
This tutorial was written with the assumption that you have a basic working knowledge of PSP. I'm using PSP X2, but this can be done in any other version
Open a 600x600 transparent canvas and flood fill white
Open a new raster layer and flood fill with a med dark color from your tube and apply your mask, merge group, resize this layer by 70%
Using your rectangle preset shape tool, draw out a good sized box with your foreground color set to the blue and your background color set to nil line width set at 9, convert this to a raster layer
Using your magic wand click inside the square and expand by 3, copy and paste a close-up of your tube, invert and hit delete, add a drop shadow to your square and tube layers, lower the tube opacity to 40, merge down
Using a font of choice, type out the phrase "No one knows what it's like to be lonely like me behind these blue eyes, add a drop shadow
Copy and paste your regular tube, resize as needed, move towards the bottom of your square, add a drop shadow
Crop tag
Add artist info and license #
Add name
Done!!
Friday, December 16, 2011
Mistress 4 Christmas
This tutorial was written by TeddyBear on 16 Dec. 2011. Any resemblance to any other tutorial is purely coincidental
Supplies:
Tube of choice (laying tube if possible). I used the artwork of Freya Langford-Sidebottom. Please do NOT use her work unless you have the proper license to do so. You can purchase this work and obtain a license at AIL
Scrap kit of choice. I'm using a PTU kit called X-Mas Wishes by Kelly Childress of Scraps by Storm. you can purchase this kit and many more awesome kits from her at Heartbeatz Creationz
Masks - Vix_Mask297 & Vix_Mask428
Filters - Xero - Porcelain
EyeCandy 4000 - Corona
This tutorial was written with the assumption that you have a basic working knowledge of PSP. I;m using PSP X2, but this can be done in any other version
Let's get started!!
Open a 600x600 transparent canvas - Flood fill white
Copy and paste paper apply Vix_Mask297 - merge group - resize by 75% - lower opacity to 83%
Copy and paste green glitter tile - apply Vix_Mask428 - merge group - resize by 75% - lower opacity to 51%
Copy and paste poinsetta - drag below both mask layers
Copy and paste tube - move towards to bottom of tag - resize - add drop shadow
Copy and paste tree - resize - add drop shadow
Type out the words "Mistress 4 Christmas" - apply porcelain - apply corona with the setting below
Add drop shadow
Crop tag
Add artist info and license #
Add name
Done!!
Thursday, December 15, 2011
MESSAGE FROM AIL STAFF!!!
ATTENTION PLEASE!!!! From AIL STAFF!!!
In light of the issues with the credit card payments, we have decided that right now all payments must be made through Paypal. You can still use a credit card through Paypal. We are sorry for the inconvenience, but hope that for now this will be more beneficial for everyone. Thank you for your patience and Happy Shopping!!!
In light of the issues with the credit card payments, we have decided that right now all payments must be made through Paypal. You can still use a credit card through Paypal. We are sorry for the inconvenience, but hope that for now this will be more beneficial for everyone. Thank you for your patience and Happy Shopping!!!
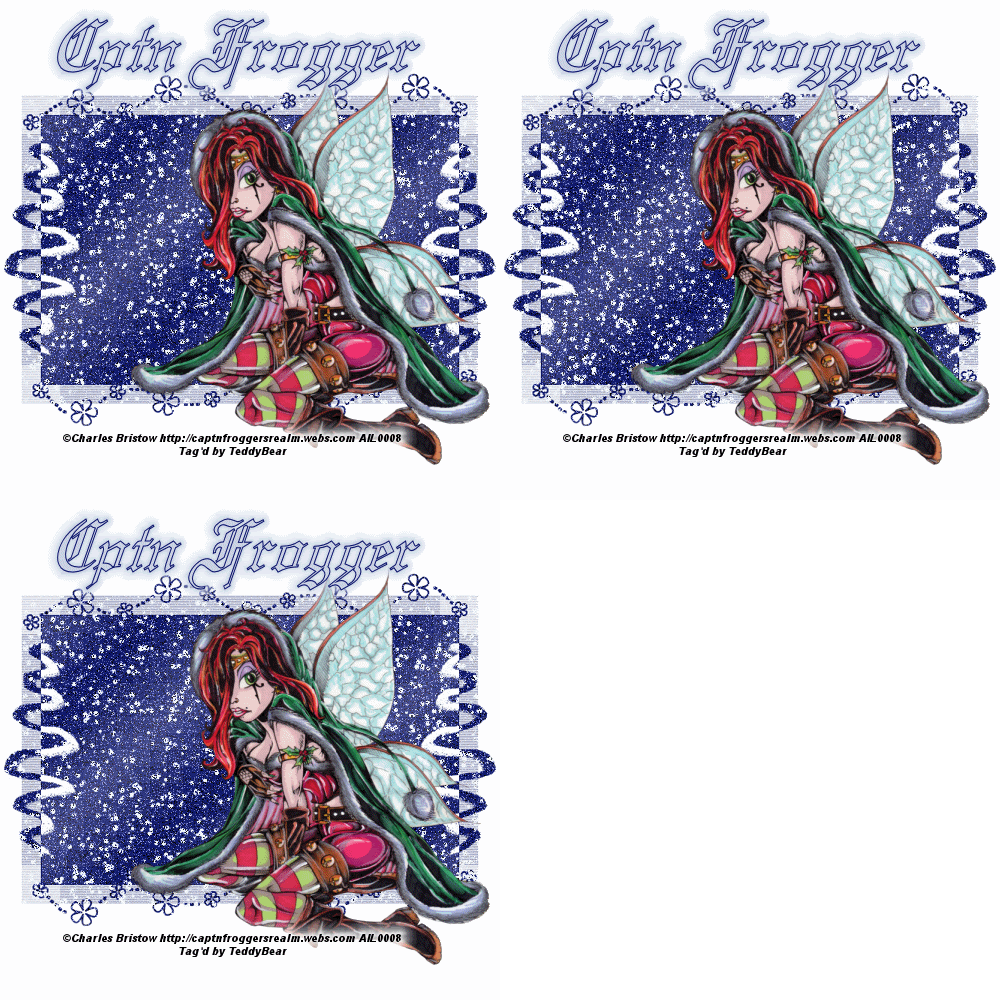
Sexy Snow
This tutorial was written by TeddyBear on 9 Dec., 2011. Any resemblance to any other tutorial is purely coincidental.
Supplies:
Tube of choice. I'm using the artwork of Charles R Bristow. Please do NOT use his work unless you have the proper license to do so. You can purchase his work and obtain a license from AIL
Mask - WSL233
Filters - VDL Adrenaline - Snowflakes
This tutorial was written with assumption that you have a basic working knowledge of PSP. I'm using PSP X2, but this can be done in any other version
Let's begin!!
Open a 500x500 transparent canvas, flood fill white
New raster layer, flood fill with a dark color from your tube, add remove noise random 40, apply your mask and merge group, add a drop shadow of choice
Copy and paste your tube, resize if needed and move to the right of your mask, add a drop shadow of choice
Add your artist info and license #
Add your name
Duplicate your mask layer 2 times so that you have 3 mask layers
on your first layer apply VDL Adrenaline - Snowflakes default settings, change color to icy blue
Repeat this step on the other 2 layers, but change your random seed number for each layer
Open up animation shop
Go to PSP and hide 2 of your mask layers
activate your tube layer and copy merged, go into animation shop and paste as a new animation
Back in PSP, hide your first mask layer and unhide your second, copy merged, and paste after current frame back in animation shop
Again back in PSP hide you r second layer and unhide your 3rd mask layer, copy merged and again paste after current frame in animation shop
In animation shop click on your first frame, edit select all and change your frame properties to 55
Save your tag as a GIF
Done!!!
Saturday, November 19, 2011
UPDATE!!
Ok so I've been really busy here lately, with work and my step-kids being here over the summer PLUS marrying the most wonderful most beautiful woman in the world...the lovely Kellie of Coyotie Designs
I have a lot of new tuts that I just need to get posted on here and several more in the works and I'm working on adding a fan page to Facebook so look for it very soon
SILVER AND GOLD TAG CONTEST!!!!
The new PSP Party E-Mag is having a tag contest!!!!
Come and join us in the Silver and Gold tag contest....the link to all the details is below
and come like our fan page on Facebook....located HERE
All winners will be posted in the Dec. issue of PSP Party E-Mag!!!!
Thursday, May 26, 2011
Dark Love
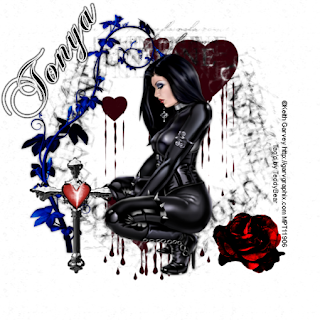 This tutorial was written by Teddy Bear on May 24, 2011. Any resemblance to any other tutorial is purely coincdental.
Supplies:
Tube of choice. I'm using the art work of Keith Garvey, please do not use his work unless you have the proper license to do so. You can purchase his work and obtain a license from PTE located HERE
Scrapkit of choice. I'm using a PTU kit called Into the Darkness made by Tonya of Broken Sky Dezine. You can find this and many more awesome kits from her HERE
Vix_Mask01 located HERE
This tutorial was written with the assumption that you have a basic working knowledge of PSP. I'm using PSP X but this can be done in any other version.
Let's begin!!
Open a 600x600 transparent canvas, flood fill white
Copy and paste your paper apply mask resize by 85 and merge group
Copy and paste bloody hearts resize by 85 drag below mask layer
Copy and paste cross resize by 75 move to the lower left corner and add drop shadow
Copy and paste rose resize by 55 twice move to the lower right corner
Copy and paste vine move to the left side drag below cross layer and add drop shadow
Copy and paste your tube resize, place where desired and add drop shadow
Crop tag
Add artist info and license #
Add name
Done!
Tuesday, April 5, 2011
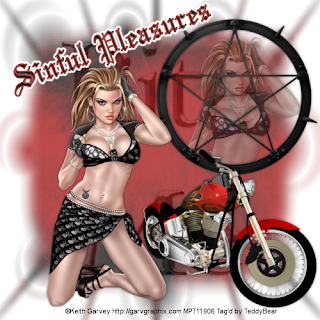 This tutorial was written by TeddyBear on 03-12-2011. Any resemblance to any other tutorial is purely coincidental
 Supplies:
Tube of choice, I'm using the artwork of Keith Garvey, please do not use his work unless you have the proper license to do so. You can purchase his work and obtain a license from PSP Tubes Emporium located HERE
Scrapkit of choice, I'm using a PTU kit called A Wicked Kind of Love from Broken Sky Designs. You can find this kit and many more kits from her HERE
PSP Default Mask - Edge Burst
This tutorial was written with the assumption that you have a basic working knowledge of PSP. I'm using PSP X but this can be done with any other version
Let's start
Open a 500x500 transparent canvas and flood fill white
Copy and paste a paper apply your mask and merge group
Reduce the opacity to 71
Copy and paste your word art and drag below your mask layer
Copy and paste pentagram and resize by 65% and move to the upper right corner
Copy and paste a close up of your tube if possible and resize by 40% drag this below your pentagram layer
Copy and paste the bike and resize by 75%
Copy and paste the tube resize by 75%
Add a drop shadow to all layers except your mask layer
Crop tag
Add artist info and license number
Add name
Done
Labels:
sinful pleasure brokenskydesign
Tuesday, February 22, 2011
Darkest Desires
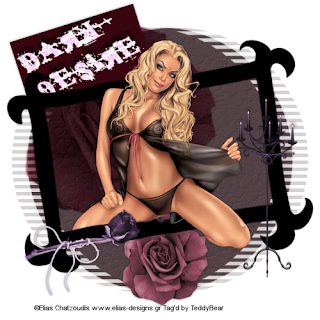
This tutorial was written by TeddyBear on Feb. 10, 2011. Any resemblance to any other tutorial is purely coincidental.
Supplies:
Kneeling tube of choice, I'm using the artwork of Elias Chatzoudis. Please do not use his work unless you have the proper license to do so. You can purchase Elia's work and obtain a license from PSP Tubes Emporium HERE
Scrapkit of choice. I'm using a PTU kit called Dark Desire from BrokenSky Dezine..you can find this and many more awesome kits HERE
Vix_Mask12 found HERE
This tutorial was written with the assumption that you have a basic working knowledge of PSP. I'm using PSP X but this can be done in any other version.
Let's start!
Open a 500x500 transparent canvas and flood fill white
Copy and paste your paper and apply Vix_Mask12, merge group
Copy and paste rose2, duplicate and resize one copy to make larger, move to the upper left hand side of the mask and drag below - move the other copy to the bottom center of the mask and add a drop shadow
Copy and paste the word art and move to the upper left, rotate slightly and add a drop shadow
Copy and paste frame resize and rotate slightly to the left and add drop shadow
Copy and paste your tube, resize if needed, move to the bottom of the frame, duplicate and drag one copy below the frame layer, on the top copy erase part of her leg so she looks like she is straddling the frame, add drop shadow to the bottom copy
Copy and paste dead rose1 resize rotate and place to the lower left of the frame and add drop shadow
Copy and paste candle resize and move to the right and add drop shadow
Crop your tag
Add artist info and license
Add name
Done!!
Friday, February 11, 2011
My very first tut - Sensual Desires
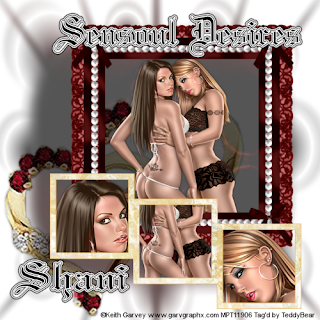
My Very first Tut
This tutorial was written by TeddyBear on Feb. 5, 2011. Any resemblance to any other tutorial is purely coincidental.
Supplies:
Tube of choice, I'm using the artwork of Keith Garvey. Please do not use his work unless you have the proper license to do so. You can purchase his work and obtain a license at PSP Tubes Emporium found HERE
Scrapkit of choice, I'm using a PTU kit called Enchanted Grace made by Shani of Wicked Princess Scraps, you can find this kit and many more awesome kits from her HERE
Edge Burst Mask (psp default mask)
This tutorial was written with the assumption that you have a basic working knowledge of PSP. I'm using PSP X but this can be done with any other version.
Let's begin!
Open a 500x500 transparent canvas and flood fill white
Copy and paste a paper apply your mask and merge group
Copy and paste Bling resize and move to the lower left of the tag, add a drop shadow
Copy and paste your large frame resize, copy and paste your tube resize and drag this below your frame layer add drop shadows to both your tube and frame
Copy and paste your triple frame resize and move to the bottom of your large frame, using your magic wand tool click inside the first square
Selections - Modify - Expand by 4
Copy and paste your tube again and move down so that a part of the tube is inside the marquee
Selections - Invert - hit your delete key
Drag this below your triple frame layer add drop shadow
Repeat this step for the other 2 squares and add a drop shadow to the triple frame
Crop your tag
Add your artist info and license if required
Add your name
Your Done!
Subscribe to:
Posts (Atom)


